top of page

Form
In this class we will explore the use of various modes of 3D modelling.
On the first day of class we downloaded Rhino software. We started by exploring the program individually and experimenting. I think this is a very robust program and I am very excited to use Rhino to make projects and models. I like that it has a command line and a lot of keyboard shortcuts. that will make it easier o use. I think this class will be very interesting and it will be fun to take projects from the software into real life via 3D printer and other methods.

Lab 1 Part A
For this assignment we were given a list of commands to use in Rhino to help us learn the program. Working in 2D with Rhino was not as difficult as I thought it would be. I liked being able to type into the command line because it reduced the amount of time I had to spend moving the mouse around and clicking on things. I also thought it was very satisfying to trace around shapes in pictures. I think that was the most fun part of this section of the lab.

Lab 1 Part B
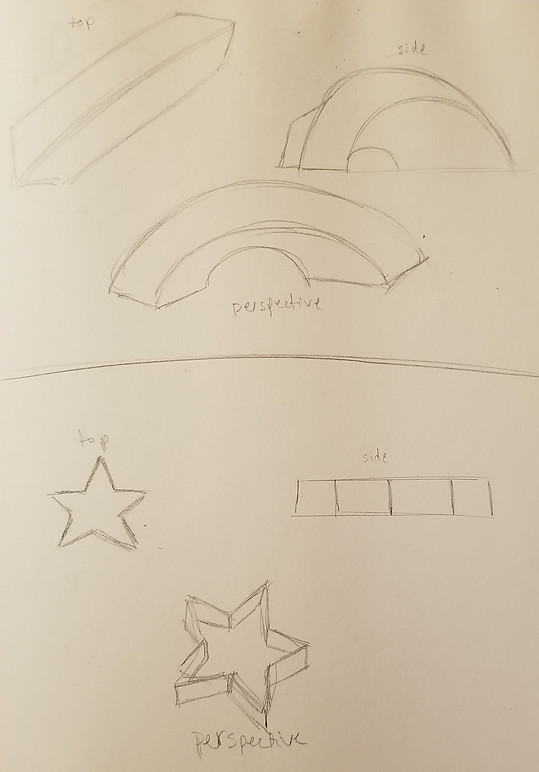
In this section of the lab, we began working with planes and surfaces. It was exciting to see some of the objects in these exercises become more dimensional. In this section, I had to learn to switch between multiple views in order to effectively create the shapes that I wanted. I still need to learn better ways to switch between viewpoints, or maybe look at multiple views simultaneously.


Here are some sketches of my two favorite shapes from this section.
Lab 1 Part C
In this section of the lab we created several 3D objects using a wide variety of methods. Some used planes to create solid 3D shapes, and others combined shapes or cut pieces away from objects. I'm not exactly sure how or why you would use all these tools in actual modeling, but I'm sure once we start actually modeling shapes I will understand a lot better.


Lab 1 Part D
These were my favorite shapes that I made from the earlier parts of the lab. I chose the box and cylinder object to 3D print. I was able to print it on my own and everything went smoothly. It only took about 7 minutes to print the whole thing. I printed with a raft on the bottom to help support the print. At the end I had to remove the raft, which was a little difficult because the print was so small. It turned out well though.

Here is a photo of the finished product.


Lab 2 Part A
In this lab we modeled a 3D object in Rhino using the techniques used in the last lab. I made a wine bottle. In my first attempt, I tried to sweep 2 rails in order to make the shape of the wine bottle. This didn't work very well, because my model ended up not being very symmetrical. I then tried o build my wine bottle out of cylinders and spheres. This was a lot more effective. I used the BooleanDifference command to cut out the dome in the bottom of the bottle. I also used FilletEdge several times to round the edges and mimic the actual shape of the bottle. The only thing I did not know how to do, was make the joint at the bottleneck smother. In my model, it is very abrupt, so I would like to learn what functions could be used to smooth that out.


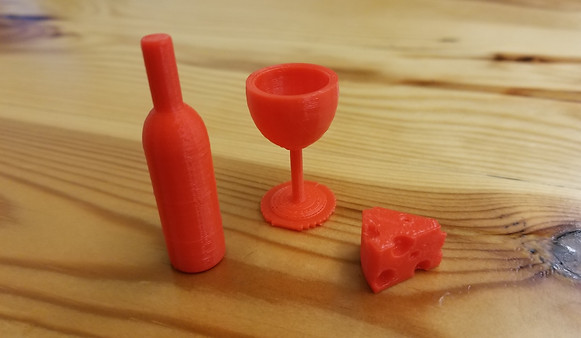
I 3D printed my model, and this is how it turned out.

Lab 2 Part B
In this part of the lab we modeled an object and then used the slicer program to cut the 3D object into layers. We then laser cut each layer and put them all together to recreate the 3D object. I made a range of waves. I was inspired by landscapes. I modeled a shape that looks like both mountains and ocean waves. I used these two inspirations to make an abstract form. I creates a surface in Rhino from a network of open curves. I then extruded the surface to create the 3D form. I was cool to learn how to make a 3D model out of flat, laser cut pieces. It was also a lot of fun to put together all the layers once they were cut out. It was like putting together a jigsaw puzzle.


Lab 2 Part C
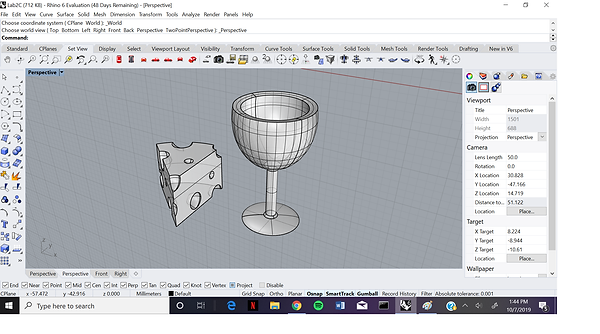
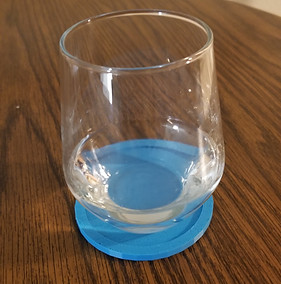
For this section, we modeled at least 2 more objects to go with the object we modeled in part A. In the first section I made a wine bottle, so in this section I made a wine glass and a block of cheese to go with it. When I actually printed these pieces, I ended up printing the wine glass a little bit too large.


Lab 2 Part D
In the last section of Lab 2 we tested a few different types of wood joints. The first joint extends a piece of wood out flat. the second connects 2 pieces of wood at a 90 degree angle, and the last can be anything we want. For extra credit we can use the wood joints to make something. My first joint uses star cutouts to extend a piece of wood out flat. the second is a slot joint that creates a 90 degree angle, and the last joint connects two pieces with a slot and tenon. I struggled with the last joint. The slot was not the correct thickness. I reprinted it two more times, but I never got it quite right. My favorite was the slot joint, so I used that to make a display window for extra credit.


Lab 3 Part A
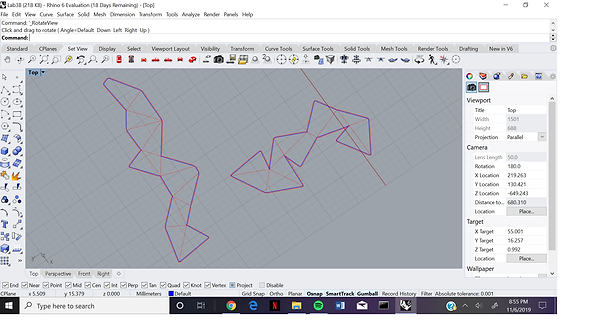
In this section, we were required to model three different objects in Rhino. Then we had to "unroll" them using various different methods to they could be printed out flat and then reconstructed. It was difficult to model complex shapes in this way, because all the outer surfaces had to be flattened into smaller shapes. Some objects were not good for unrolling. Some required many polygons and some required only a few. It is also important to determine which way to unroll an object. Some look more accurate when unrolled with varying polygons, while others looked better when divided into lofted strips, and others even were better with entire sides split up individually.

Lab 3 Part B
For this part, we had to take one of our models from part one and actually print it out. I chose to print out the star shape that I modeled. Two points of the star are flat so it will stand up on its own. I used the grasshopper plugin for Rhino to make dashed lines in my model on the fold lines and tabs on the edges. The next step was to laser cut the model out of paper. Once it was printed, I had to fold on the dotted lines and glue the corresponding tabs together. I did not print labels on the tabs, but putting the star together still was not as difficult and time consuming as anticipated.


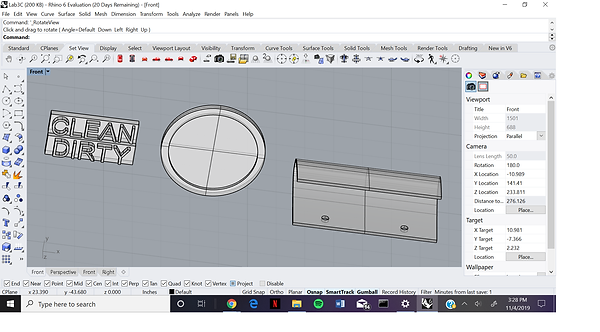
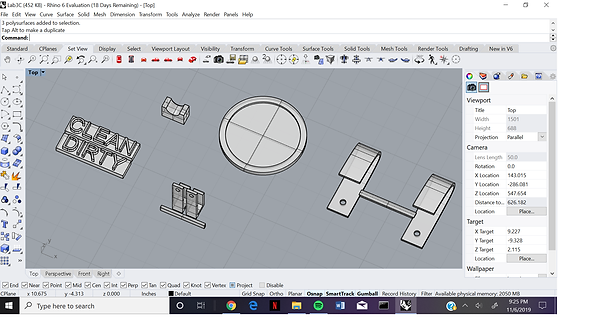
Lab 3 Part C
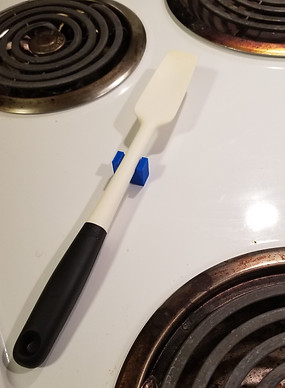
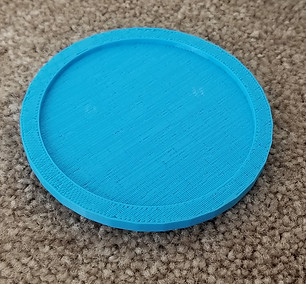
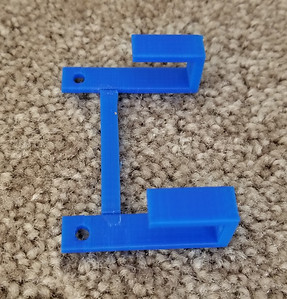
The last step was to model three functional objects in Rhino, and then 3D print them. I chose to make a coaster, a spoon rest, and a coupon holder for the cork board on my fridge. I had to change a lot of my designs so that they would print in a reasonable amount of time. I made most of the objects smaller than I had originally planned. The first picture shows my original models and the second showed the changes and additions that I made the day of printing.
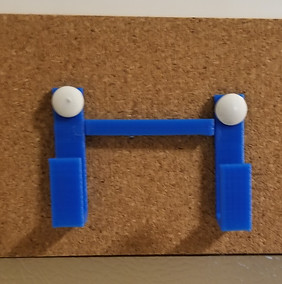
The next photos show the printed objects and their functions.


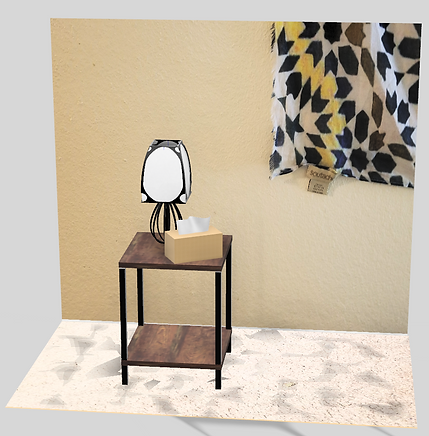
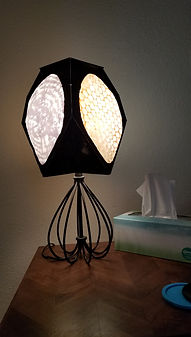
In this lab we were required to make a model of our final project in its ideal setting. For my final project, I will be making a lampshade. I wanted to incorporate a lot of laser cut shapes that can have light showing through them. The lampshade will be made of mostly cardboard and paper. I want to experiment with layers of thin, colored paper to make designs that only appear when the light is turned on. The shape and color of the lamp is inspired by stained glass Tiffany lamps. I want to make the hidden colors show nature patterns. I will use the laser cutter primarily to make most of the actual lampshade, but I will also need to use 3D printing for some smaller parts of it. I plan to 3D print a ring and some supports to attach the lamp shade to the lamp. I want to make a ring that the light bulb can be screwed in over as well as sockets that will snap onto wires that will hold the lampshade up. It is very important that the material I use for the lampshade is light so the supports will be able to hold it up. The ideal setting for this object is on the table in my living room. There is a lamp there with a broken lampshade, so this project should make a good replacement. I included models of a side table, a box of tissues, a section of my wall where the lamp shade should go, and even the lamp it will eventually be attached to.
Lab 4


Final Project
For the final project, I will be creating the lamp shade that I modeled in Lab 4. I am excited to experiment with materials to see what will work.
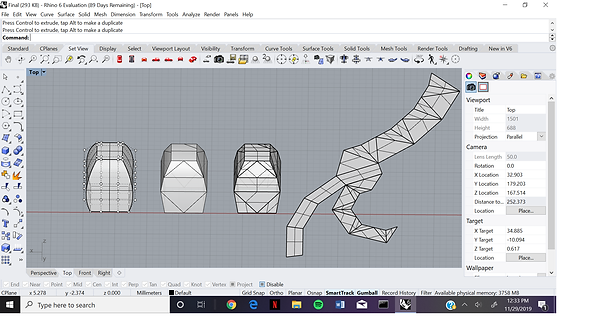
First I modeled the shape of the lampshade in Rhino. I used cage edit to change the shape of a box. I then made a mesh and unrolled it so it could be printed in the laser cutter.
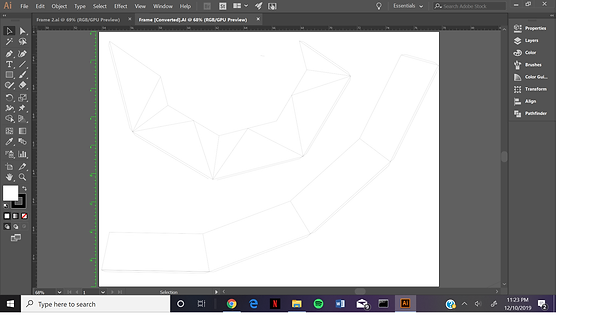
I imported the design from Rhino into Illustrator and laser cut a model of it, then made it larger and laser cut the real thing.

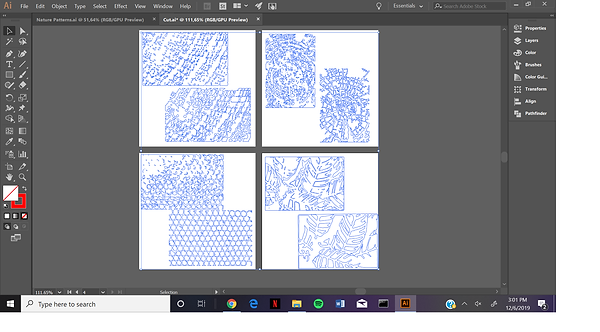
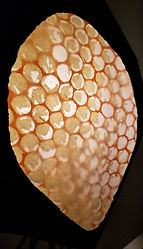
My next step was to find nature patterns to fill the windows on the sides of the lamp. Once I found some good photo examples, I transferred them to Adobe Illustrator. I used this program to separate each pattern into layers that I was then able to outline so they could be used to laser cut paper.

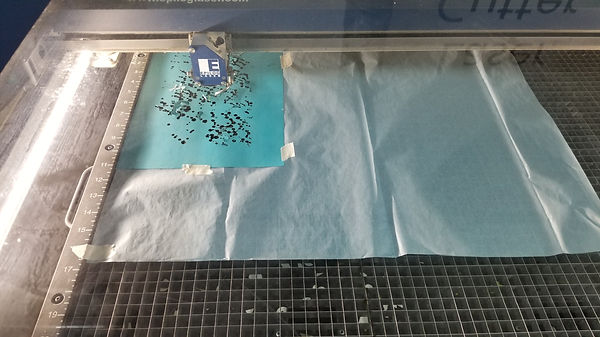
The challenge here was to find material that would laser cut well and also be thin enough for light to pass through. I used thick art paper for the shape of the lamp, and I used tissue paper for the nature patterns. It was difficult to cut tissue paper in the laser cutter because the ventilation fan would make it move around too much. I solved this problem by taping a regular piece of paper on top of the tissue paper and then laser cutting through both layers. This worked very well and it gave the tissue paper some support until I was able to attach it to the lamp.
.jpg)
Next I pasted the tissue paper layers onto plastic. This was difficult because there were so many small pieces to keep track of.


I painted the frame black so it would block more light and look more finished.
I then attached all the patterns to the frame and glued all the tabs together to complete the lamp shade.
The final step was to create a stand out of wire and hot glue it to the inside of the lamp. I decided to make the stand entirely out of wire and hot glue instead of 3D printing part of it.

Next I added a few laser cut strips of cardboard to add support.


And it is finished!


bottom of page